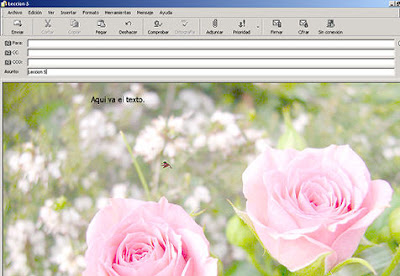
Aquí se encuentra la lección 5 en inglés.
Necesitaremos
— un gif animado pequeño, que se moverá después en círculos a causa del script.
— un fondo, puede ser una imagen o una textura.
— un archivo de música.
Utilicé una imagen floral de 1024 x 768 y el gif animado es un colibrí de 61 x 48 pixeles.
Guardar el archivo (lo descargas del enlace) en: C - Archivos de programa - Archivos comunes - Microsoft Shared - Stationery. Seguir las indicaciones y pautas que se han dado para la lección 1.
- - -
Aquí esta el código con las indicaciones para realizar los cambios:
!DOCTYPE HTML PUBLIC "-//W3C//DTD HTML 4.0 Transitional//EN"
HTMLHEAD
META http-equiv=Content-Type content= "text/html; charset = windows-1252 "BASE
href = "file: /// C: / Archivos de programa \ Archivos comunes \ Microsoft Shared \ Stationery \ "
STYLE type=text/css
!--
body {
font-family: "Comic Sans MS"; TIPOGRAFIA
font-size: 14pt; TAMAÑO DE LA LETRA
margin-left: 220; DISTANCIA EN PIXELES DESDE EL MARGEN IZQUIERDO HASTA EL COMIENZO DE LA ESCRITURA (dejar asi o cambiar a gusto)
background-color: #ffffff; DEJAR ASI, BLANCO, O PONER UN COLOR ACORDE CON TU IMAGEN DE FONDO
color: #F0F0FF; COLOR DE LA FUENTE
}
--
/STYLE
!-- An optional background image can be used but it will not scroll --BGSOUND
id=music style="DISPLAY: none"
src="lesson5.mid" MUSICA
loop=99
META content="MSHTML 6.00.2800.1593" name=GENERATOR/HEAD
BODY bgProperties=fixed bgColor= #ffffff DEJAR ASI, BLANCO, O PONER UN COLOR ACORDE CON SU IMAGEN DE FONDO
background="lesson5back.jpg" IMAGEN QUE USARAS COMO FONDO
DIV /DIV!-- This is the object in orbit. You should include the height and width --IMG
id=pic
style="LEFT: 50px; WIDTH: 72px ANCHO DE TU GIF; POSITION: absolute; TOP: 50px; HEIGHT: 95px ALTURA DE TU GIF"
src="lesson5pic.gif" GIF ANIMADO
SCRIPT language=VBScript
REM Edgar V. Poirier
REM moomoo@nbnet.nb.ca
Dim w, wW, wH, myTimer, A, R, cx, cy, x, y
Set w=document.body
REM Initialize
sub window_OnLoad()
On Error Resume Next
REM Get Window dimensions
wW=w.clientWidth
wH=w.clientHeight
REM Set the Radius
R=75
REM Starting angle. Angles are in Radians. 1 degree = 3.14150/180 radians
A=0
REM Set the center of the circle to the window center
REM Note the offset due to the fact that the object is
REM positioned using its TOP and LEFT properties.
cx=wW/2-pic.offsetWidth
cy=wH/2-pic.offsetHeight
orbit
end sub
REM Move the object in a circle starting at an angle of 0, then increasing the angle.
sub orbit()
ClearTimeOut(myTimer)
REM Increase the angle
A=A+.01
REM Calculate the new coordinates
x=R*COS(A)+cx
y=R*SIN(A)+cy
REM Position the object.
pic.style.left=x
pic.style.top=y
REM Repeat for next angle change.
myTimer=SetTimeOut("orbit",20)
end sub
/SCRIPT
/BODY/HTMLEtiquetas: Tutoriales HTML |